Ontrack cares about your security
To protect your data, we have provided it to you on an encrypted drive. Your Ontrack representative provides the password needed to access your data.

How to Access Your Recovered Data
Follow these steps to access the encrypted information on the Ontrack provided drive with a Windows or Mac computer.
Note: Unless specified, recovered data is provided in the format of the source media (data from Mac formatted drives is generally not accessible on Windows systems.)
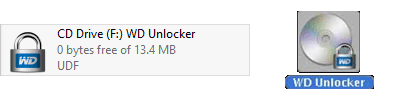
If it shows up as “CD Drive WD Unlocker” or “WD Unlocker” in File Explorer for Windows or Finder for Mac, open it and double-click WD unlocker to run it and proceed to step 4 below (ignore step 3). If you do not see CD Drive WD Unlocker, proceed to Step 3 below.
Enter the password for the drive and click “Unlock Drive”. The drive should say it’s unlocked and will appear as a new, separate drive named a drive labeled “My Passport” or “ODR 1234567”
(Instead of 1234567 it will be your service order job number) should become available, but it won’t pop up automatically.
Note: If you are prompted for a username or user ID,
please check here.
Note: Clicking the Hint button will show your job number – this is not the password to access your data. The password was sent to you by your sales representative.
After unlocking, drive should be mounted and ready to use, but may not automatically pop up.
- In Windows, go to "This PC", (click the Windows button, type “This PC”, and enter) a drive labeled “My Passport” or “ODR 1234567” (Instead of 1234567 it will be your service order job number) is now available.
- On Mac, the drive will appear on the desktop as “Untitled” or a drive labeled “My Passport” or “ODR 1234567” (Instead of 1234567 it will be your service order job number.)
The drive will have a folder titled with the job number (also known as SO number or Service Order number) which will contain your recovered data.
If no “ODR 1234567” or “My Passport” drive appears after unlocking, check to see if your data was recovered from a Mac. If we recover data from a Mac, we put a Mac format onto the portable drive to preserve the data structure. A Mac formatted drive doesn’t normally display on a Windows computer. Connect the drive to a Mac or, if you’re unable to do that, call our support department at 0508 872 259.
Removing the Password
The process for accessing your data above will be required each time the drive is connected to a different computer. If this level of security is not required and there is a need to simplify portability, the password requirement can be removed following these steps:
Step 1
Install WDSecuritySetup
Download and install “WDSecuritySetup” for Windows or for Mac. Once done, run it. On Windows, it will be a light blue padlock icon on your main Windows screen (the Windows Desktop.) On a Mac, it will be in the Applications folder.
Step 2
Enter password
Enter the current password for the drive, make sure "Remove Password" is selected, and click "Update Security Settings".

Step 3
Update Security Settings
A screen with a prompt to set a password will appear as shown here. We recommend closing this window without entering a new password.

A notification will appear indicating that the password has been removed. Click “Close” on the message box and then close the WD Security application.

If you are prompted for a username or a user ID.
What’s happening is that Windows has detected that you don’t have permissions to run security software on that computer, so it’s asking for the username and login of an administrator who has those permissions, so that it can run the software that unlocks the drive. There are two ways to resolve this:
- Connect the drive to a computer that you own (rather than your computer at work) and follow the steps above to remove the password. Then the drive will be permanently unlocked for all computers (unless you add a new password, which we don’t recommend). The drive will no longer be locked, so you should be able to use it on your work computer, as long as your workplace hasn’t restricted access to portable USB storage devices.
- Have an administrator (someone from your IT department) remove the password by providing them with the password and the instructions detailed above.
If you have any questions, please contact us here or call 0508 872 259.